Wednesday, 31 March 2010
cake walk socks - pattern now online!
I have just published my first ever knitting pattern! Its for the socks I featured last week - and the pattern is now available on Ravelry for £3.50 or $5.00.
 So, if you fancy a new project, perhaps you might consider these socks ;o)
Friday, 26 March 2010
tutorial: convert a rucksack into a pannier (part 1)
I set myself a challenge last week. I'm starting a new job in the next week which will involve cycling to the station and then taking two trains and a bus to get there. I have panniers for my bike, but they are awkward to carry around, and I don't like cycling with a rucksack on my back because I get hot at the best of times. So, the challenge: to create a means of converting a rucksack into a pannier which can then be swiftly turned back into a rucksack. Simple!
Here is my trusty vintage Raleigh Stratos bike, smart isn't she? I think she is about as old as I am!


Here is my trusty vintage Raleigh Stratos bike, smart isn't she? I think she is about as old as I am!

This is the sort of thing I am trying to replicate

So, the idea I came up with was to create a sleeve or pocket on the back with something stiff to which I could attach hooks, and a bungee at the bottom.
To create your own converter you will need the following:

A rucksack (old or new).
Fat quarter of cloth, with some of a different colour for the inside of the pocket.
A thin plastic chopping board, preferably with a handle.
Some appropriate sized hooks/with bolts to connect them - I got my hooks from Ikea.
An old bungee.
Some velcro. I used a bit of ordinary sew on velcro, and also salvaged a velcro loop from another bag.
A length of strap (again, I salvaged mine).
First of all you need to cut your fabric. I folded the fat quarter in half lengthways and then tore it into shape so that it was just over 3cm wider than the chopping board, keeping it double thickness. I then cut a piece of black cotton fabric to match (single thickness) for the inside of the pocket.

With right sides together, sew around the sides and bottom, keeping the folded edge to the top.

Cut off the corners, turn right side out and press. Turn down the top to the back and stitch. This will create the front of your pocket.

We now need to add some gussets to make enough space for the board to fit. Cut two pieces from the remnants of your fat quarter, each about 20cm wide. Right sides together fold each in half to create strips and press the ends over so that the fabric will be the same height as your pocket. Sew down the fold lines, trim the excess and turn rightside out. Roughly serge or oversew the edges so that they don't fray.

Pin these two pieces onto the back of the pocket with the folded edge outermost and stitch close to the edge of the pocket. I also stitched along the bottom, for extra strength.

Now comes the tricky part. Attach the board to the top carrying handle of the rucksack with the velcro loop so that you know where to put the pocket. Pin one edge on.

Now, unless you are a genius or have a very flexible sewing machine, we are going to need to do a bit of hand sewing in order to attach the pocket to the rucksack. I used a overcast or whip stitch. The first side is easy!

Repeat with the second edge, but you will have to sew inside the tube as it were, which is hard when you get to the middle, but persevere!
You could sew the bottom of the pocket in the same way, but I just sewed a small piece of velcro, bottom centre, to keep it closed. Not very neatly sewn, but its hidden!

Pop your board back in, and you will then be ready for Part 2 of the tutorial (attaching the hooks and the bungee... coming soon!).

The bungee will be attached to the bottom of the rucksack; the board will be drilled for the hooks.
Thursday, 25 March 2010
easter card to share
Here is a free Easter card to print out and share... enjoy :-)

Here is the link to download it from: Happy Easter. The image is a photograph I took in a Northamptonshire church, couldn't resist those gorgeous flowers.

Here is the link to download it from: Happy Easter. The image is a photograph I took in a Northamptonshire church, couldn't resist those gorgeous flowers.
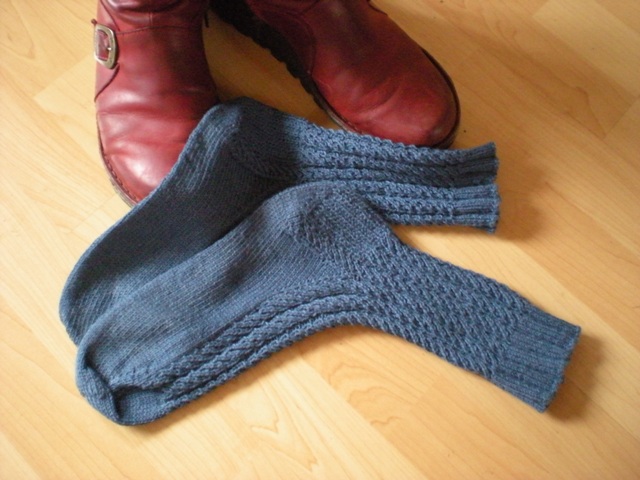
sneaky peek I: new socks
Time for a sneak peek of the new socks I just designed - my first sock pattern, so a bit scary. I've knitted up the first one, and it seems to have worked!

I've decided to call them cakewalk socks as the textured stripe goes up and down :-)

Here is the heel, and the sock actually on:


Any feedback gratefully received... do all the elements work?
Katie xoxox

I've decided to call them cakewalk socks as the textured stripe goes up and down :-)

Here is the heel, and the sock actually on:


Any feedback gratefully received... do all the elements work?
Katie xoxox
Monday, 22 March 2010
the weekend
Not much to report from the weekend as we were busy entertaining. But, lunch went down well (leek & potato pie, with pastry snowdrops on the top, roast taters and parsnips, followed by rhubarb and raspberry crumble) - and managed to get some homegrown produce in there which is always satisfying. The lion and tiger were hits with the boys (and parents!) with lots of loud roaring going on.
I went down to the allotment afterwards as it was such a beautiful day it would have been a shame to miss it, despite a full tummy. Got a bit of gentle digging done, sowed swiss chard, rainbow chard, beetroot and spinach, and got my shallots and onion sets planted. I'm going to go for a more permaculture approach this year as I'm not going to have as much time to spend down there, so I'm planning to grow more things in mixed patches (the two lots of chard and spinach were all sown together), much closer together so the weeds don't win out, and plenty of flowers like calendula in between. Hopefully this will mean that the allotment looks pretty rather than messy, which it usually does!
This is my 'raised bed' system for carrots: my carrots were rubbish last year, so hoping that this dismantled compost bin will help - and thwart the dreaded carrot root fly.

I've filled it with compost from my ungainly compost heap.

And last, but not least, here is a little froggy that nearly gave me a heart attack last time I was down there by jumping when I least expected it! The frogs are getting busy in ours and next door's ponds, so we may have frogspawn soon :-)

The garden is looking greener than ever, I really enjoy the anticipation of things coming up and getting ready to flower. The snowdrops are still looking pretty.

Our garden goes up a hill so is very shady and steep. The lower bit is terraced and is a mixture of cottage garden (well, that's the plan) and veg and chickens. The upper bit is becoming a wild garden. We had to clear mountains of ivy and bramble, but it is now grassed over and has loads of wild flowers like campion, self heal, toadflax etc dotted around - and bluebells of course!
Then:

And now:


Here are some wild arums (lords and ladies) just poking up:

Let's just hope the sunshine keeps up!
Friday, 19 March 2010
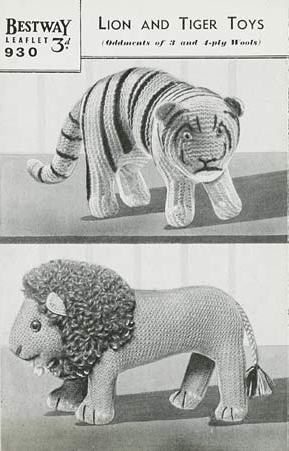
introducing tim the tiger and leo the lion
We've got two lots of friends coming over on Sunday, bringing their two little boys, Luke (3 in Sept) and Ben (2 in June). When I found this vintage knitting pattern on the Victoria and Albert Museum site I couldn't resist - particularly as Luke is blonde and Ben is distinctly red headed. No prizes for guessing then who's getting what!
I did the tiger first, and didn't get chance to take any pictures of the work in progress - but here are some pictures of the lion in bits before I sewed it up.


I did the tiger first, and didn't get chance to take any pictures of the work in progress - but here are some pictures of the lion in bits before I sewed it up.

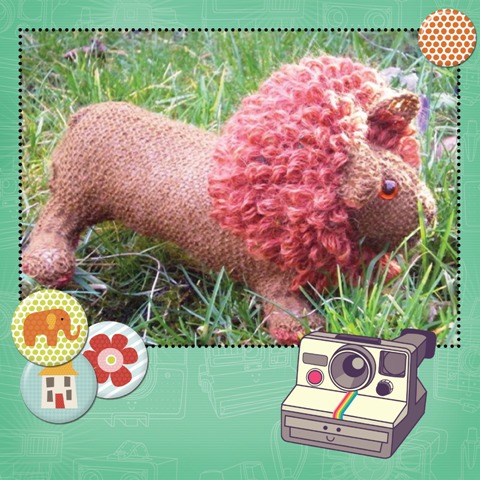
The mane was interesting - basically a loop stitch, which seemed to go on for ever and was really hard to keep neat. It ended up looking a bit like a wig on the underside - maybe I have a new career ahead of me!?
Here is the finished lion, I think he looks kind of cute frolicking in amongst the crocuses!
Here is Tim the Tiger, having a snooze on the bench after having frightened next-door's rather macho cat, Gizmo:
And finally the two playing nicely together:
I really hope Ben and Luke love them as much as I do - thinking I may have to make a lion for myself!;o)
crochet triumph!
Now I have always been slightly scared/wary of crochet - give me two, four or five needles and I'm happy - show me a needle with a hook in one end and I start to panic. A great-aunt did try to teach me the basics when I was little, but I don't think I ever got any further than chaining.
Having commenced a project to knit a couple of toys (to be blogged later today), I realised I would need to crochet the ears. Oh dear. The pattern seemed to be utterly incomprehensible (1 d.c, tr into next stitch, long tr into third stitch, etc), so I called on my mum for help and she gallantly did them for me. I had a go under her guidance but got into a bit of a mess.
I'm usually up for a challenge, so I decided to teach myself using an online tutorial over at Meet Me at Mike's which seemed pretty clear. Here are my first and second attempts (following lots of pulling down and starting over):
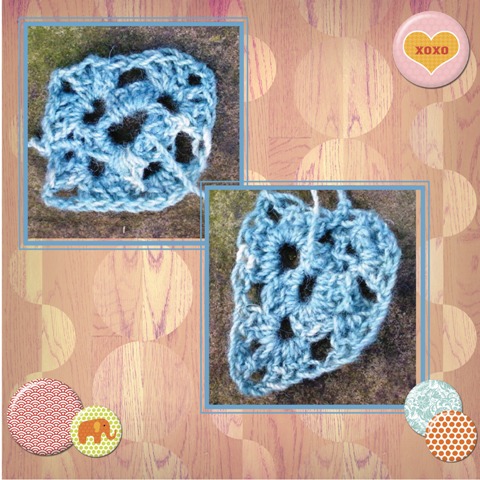
I think the second attempt is actually worse than the first (what happened to the lower corner???).
Anyway, I persevered this morning, and this is the final attempt, which I'm pretty happy with, it's not perfect, but not bad for a learner I reckon :o):

And the whole ensemble:
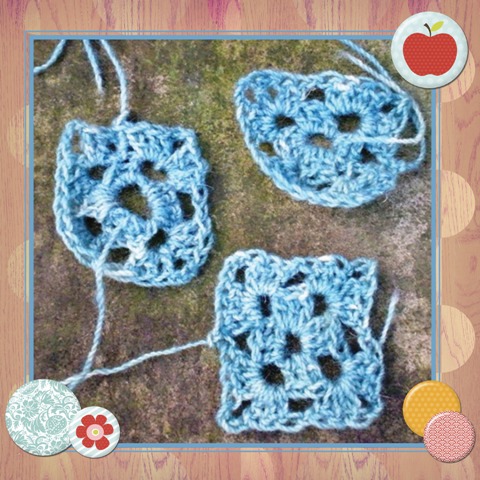
The pretty buttons and backgrounds I purchased from Jessica Sprague the other day - the backgrounds (and cameras, to be seen in the next post) are by Kitschy Digitals, the buttons by Crystal Wilkerson. Thought they might jazz things up a bit on here!
Having commenced a project to knit a couple of toys (to be blogged later today), I realised I would need to crochet the ears. Oh dear. The pattern seemed to be utterly incomprehensible (1 d.c, tr into next stitch, long tr into third stitch, etc), so I called on my mum for help and she gallantly did them for me. I had a go under her guidance but got into a bit of a mess.
I'm usually up for a challenge, so I decided to teach myself using an online tutorial over at Meet Me at Mike's which seemed pretty clear. Here are my first and second attempts (following lots of pulling down and starting over):
I think the second attempt is actually worse than the first (what happened to the lower corner???).
Anyway, I persevered this morning, and this is the final attempt, which I'm pretty happy with, it's not perfect, but not bad for a learner I reckon :o):
And the whole ensemble:
The pretty buttons and backgrounds I purchased from Jessica Sprague the other day - the backgrounds (and cameras, to be seen in the next post) are by Kitschy Digitals, the buttons by Crystal Wilkerson. Thought they might jazz things up a bit on here!
Tuesday, 16 March 2010
stash enhancement!
As it was Mothering Sunday last weekend I went to visit my mum over in Newark, Nottinghamshire. We decided to do a trawl of one of the local antique centres and then went on to a local antiques fair. It ended up being a useful stash enhancement exercise - the antique centre had lots of stalls with baskets full of buttons (how did I walk past them all in ignorance for so many years I ask myself?) - and this is what I ended up with:
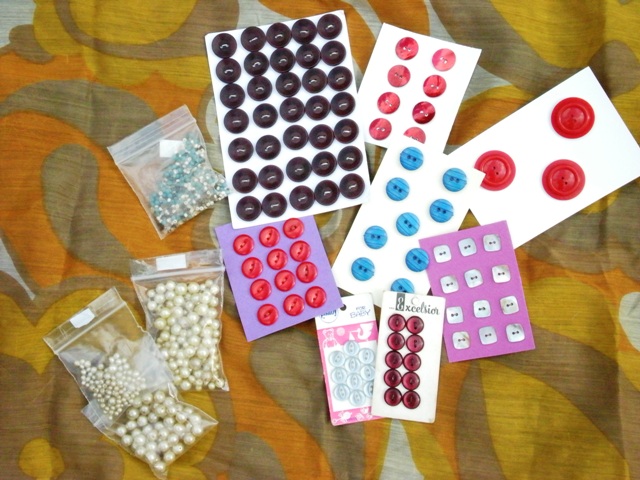
I think these blue ones are some of my favourites - so bold.

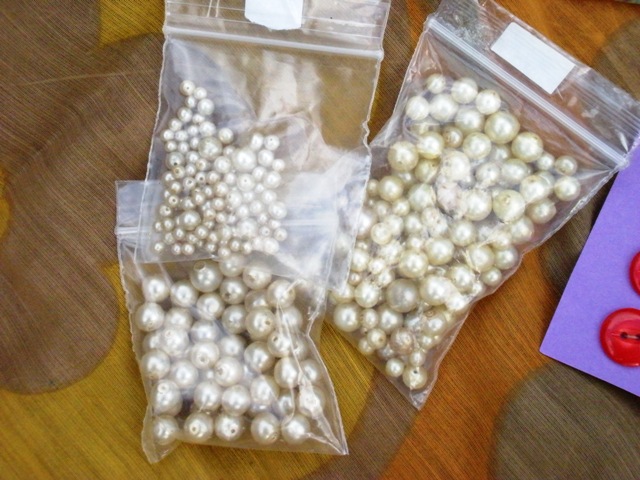
You will also notice some beads in there - mostly pearls which I plan to either restring or use to make a project or two more pretty.
I also bought the scarf they are all sitting on - a rather funky orange and yellow 70s number I picked up cheaply. Unfortunately it has a cigarette burn at one end, so if anyone has any suggestions as to how I could disguise it... I would be grateful.

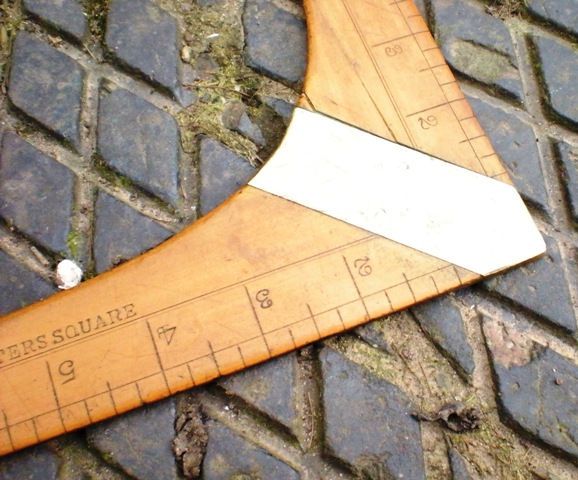
But the best finds were to come at the antiques fair... on a stall with old tools I came across this beauty and couldn't resist!
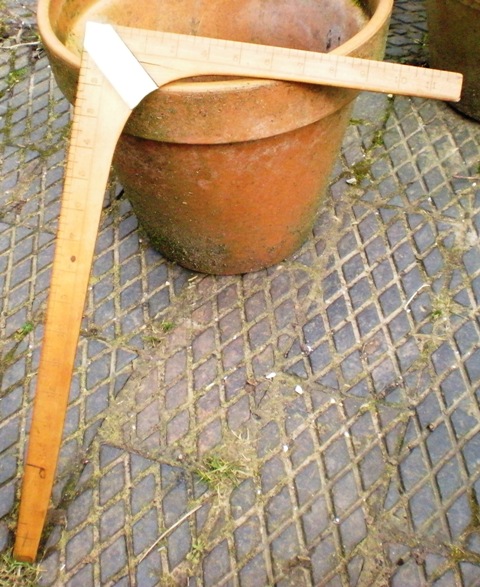
I know it looks a bit like a lopsided boomerang, but this is what it actually is - something a lot more useful ;o)

The guy asked me what I was going to do with it, and seemed quite pleased when I said I was going to use it for dressmaking. I suppose so many old tools just end up on people's walls as interior design. It has a lovely brass bit on the corner to hold the two pieces together, and I think the wood is boxwood - its a great colour.
Last but not least I also managed to pick up a pair of old, but still sharp scissors which will replace my blunt plasticky snips.
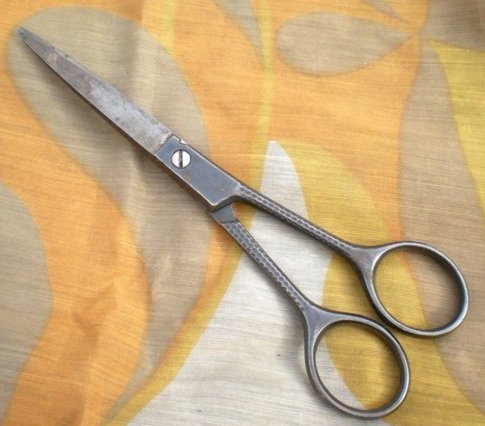
They have a nice detail on the handles which attracted me to them - they used to make things properly in the old days didn't they?

I think these blue ones are some of my favourites - so bold.
You will also notice some beads in there - mostly pearls which I plan to either restring or use to make a project or two more pretty.
I also bought the scarf they are all sitting on - a rather funky orange and yellow 70s number I picked up cheaply. Unfortunately it has a cigarette burn at one end, so if anyone has any suggestions as to how I could disguise it... I would be grateful.
But the best finds were to come at the antiques fair... on a stall with old tools I came across this beauty and couldn't resist!
I know it looks a bit like a lopsided boomerang, but this is what it actually is - something a lot more useful ;o)
The guy asked me what I was going to do with it, and seemed quite pleased when I said I was going to use it for dressmaking. I suppose so many old tools just end up on people's walls as interior design. It has a lovely brass bit on the corner to hold the two pieces together, and I think the wood is boxwood - its a great colour.
Last but not least I also managed to pick up a pair of old, but still sharp scissors which will replace my blunt plasticky snips.
They have a nice detail on the handles which attracted me to them - they used to make things properly in the old days didn't they?
bond jumper
I started knitting a jumper for me in November, hoping I would get in done in time to wear it before the winter is out. I got the pattern out of an old Rowan knitting magazine and liked its simplicity. Its called 'Bond' and was designed by Kim Hargreaves. Since finishing it a week or two ago I have worn it almost constantly, its sooo warm and cosy! Here it is, the finished item...
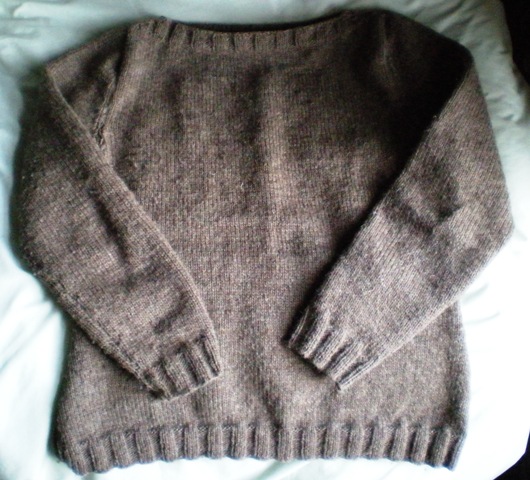
The pattern called for Rowan DK soft, which I think has now been discontinued. I had found some soft wool in Hobbycraft of all places - Eco wool by Sirdar - which is an undyed 100% wool. Not sure what the breed is (they helpfully just describe it as 'earth'), but it might be something like Castlemilk. Its thicker than the DK soft, and, as I later out, only has around half the yardage - so I kept having to go back and buy a couple more balls, and then a couple more! The pattern called for 5 50g balls, I used nearly 11 - so let that be a warning!!
It has a simple slash neck and set in sleeves, so was a good beginner jumper project.

Here is is on, photo taken on a sunny morning this weekend - excuse my double chin!
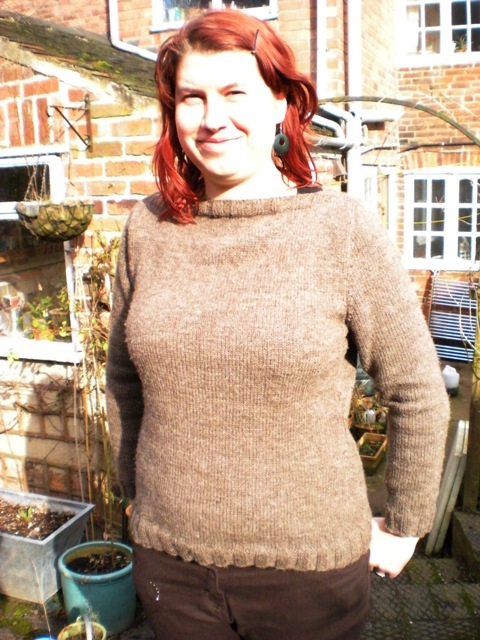
I guess I will probably get more wear out of it next winter (though I could have done with it a few weeks ago!)... its getting a little bit tooo warm out there now.
The pattern called for Rowan DK soft, which I think has now been discontinued. I had found some soft wool in Hobbycraft of all places - Eco wool by Sirdar - which is an undyed 100% wool. Not sure what the breed is (they helpfully just describe it as 'earth'), but it might be something like Castlemilk. Its thicker than the DK soft, and, as I later out, only has around half the yardage - so I kept having to go back and buy a couple more balls, and then a couple more! The pattern called for 5 50g balls, I used nearly 11 - so let that be a warning!!
It has a simple slash neck and set in sleeves, so was a good beginner jumper project.
Here is is on, photo taken on a sunny morning this weekend - excuse my double chin!
I guess I will probably get more wear out of it next winter (though I could have done with it a few weeks ago!)... its getting a little bit tooo warm out there now.
Thursday, 11 March 2010
new twirly socks!
I got my pair of 'nine-to-five' socks finished last night - as ever I ended up sitting up in bed doing the grafting... can never wait till the morning! Here is a link to the Ravelry page for the pattern info - and here is my Ravelry page.
The spiral twisty pattern was a lot simpler than I thought it was going to be - no cable needles in sight, fortunately.

Here are the finished socks:
Heel detail (half linen stitch):

I like the way the twirls come down as part of the clock:

Toe:

All in all I'm very pleased with how they've come out. Next project is to knit some to my own pattern - wish me luck!
The spiral twisty pattern was a lot simpler than I thought it was going to be - no cable needles in sight, fortunately.
Here are the finished socks:
Heel detail (half linen stitch):
I like the way the twirls come down as part of the clock:
Toe:
All in all I'm very pleased with how they've come out. Next project is to knit some to my own pattern - wish me luck!
Subscribe to:
Comments (Atom)